INTER-LAYER - Middleware to Middleware (MW2MW): How to connect two platforms at MW level
(Getting Ready) Communication scenario description
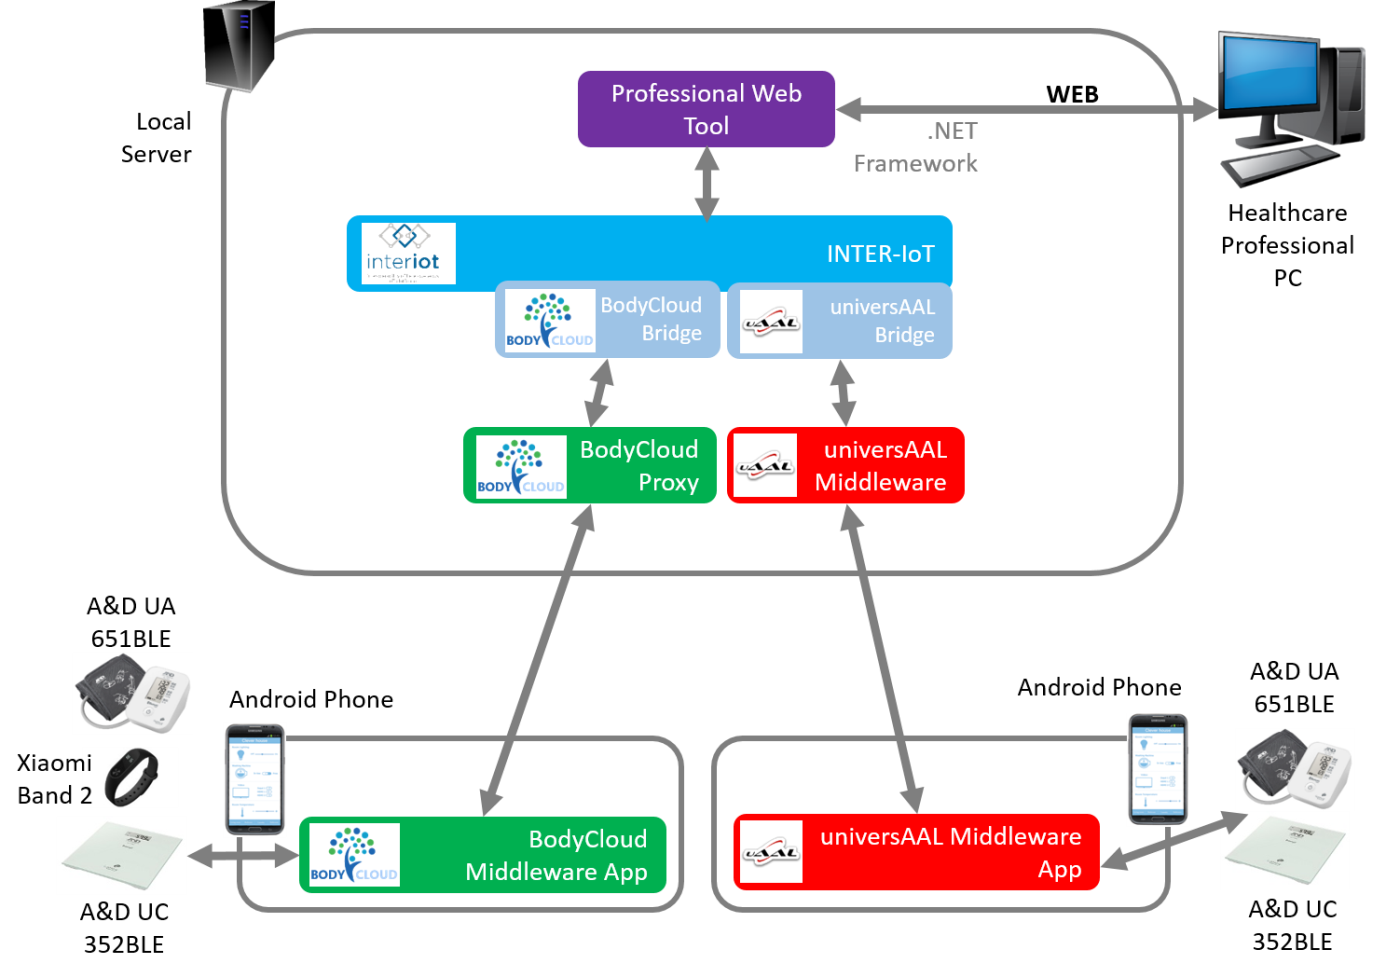
Figure 1. scenario overview
We take the exemplificative scenario the INTER-Health integration: two platforms, BodyCloud Proxy and UniversAAL, have to be connected to share medical data. Precisely, the messagges sent by the BodyCloud Proxy platform must reach the univerSAAL platform by means of an INTER-MW component realized in INTER-IoT. The communication between the platform and the INTER-MW component take place using a further software component called bridge. The interested reader will find additional information regarding this integration scenario in the Deliverable D6.1 and D6.2 of the Inter-IoT Project.
This recipe is focused on the INTER-MW component' installation, on the development of the bridge component and its configuration and usage.
Recipe ingredients
SW: INTER-MW component; VirtualBox
Prerequisites
Installing INTER-MW requires:
-
Docker and Docker Compose
-
access to the commons repository
-
access to the Inter-IoT Docker registry docker.inter-iot.eu
-
Java 1.8
-
Maven 3.6 freely downloadable at > https://maven.apache.org/docs/3.6.0/release-notes.html
-
Java developing environment SDK
For further information, read the official documentation.
(How to Do it) Software installation and module configuration
Installing INTERMW
INTER-MW is easily installed using a Docker image. To deploy INTER-MW a few Docker scripts have to be executed. These scripts can be found in the commons folder available in our repository. Specifically, under the commons folder:
-
intermw-deployment subfolder contains the script to install INTER-MW;
-
intermw-ipsm-deployment subfolder contains the script to install INTERMW with the optional IPSM component.
This recipe does not require the IPSM, so we need to locate to commons/intermw-deployment folder.
First, we need to access the Inter-IoT Docker registry by entering the terminal and executing the command
docker login docker.inter-iot.eu
Upon request, enter your username and password
The, execute the command
docker-compose up -d
once the images downloaded and uncompressed, the following services will be executed:
-
intermw with 8080 port for the REST web app API and 8980 for the callback port of the bridge;
-
rabbitmq (RabbitMQ message broker) with 5672 port, and, for the frontend port 15672 used for the admin-side web app;
-
parlamient (Parlamient Triple Store) with 8089 port.
For further information, visit the official documentation.
Due to Docker-related problems under Microsoft Windows, we opt to use Linux operating system. If you want to install the INTER-MW under Windows, you need to install all three software components individually.
The Linux operating system we used is Ubuntu 16.04 LTS installed on a virtual machine created with the VirtualBox virtualization application (installed on a machine running MS Windows 8.1). In order to access the services also under Windows, that is on the HOST hosting the virtual machine, port forwarding has been configured.
We suggest you to test if the services are active and properly working; go to:
- http://localhost:8080/swagger/# for the INTER-MW API, a Web UI as in Figure 2 should be displayed.
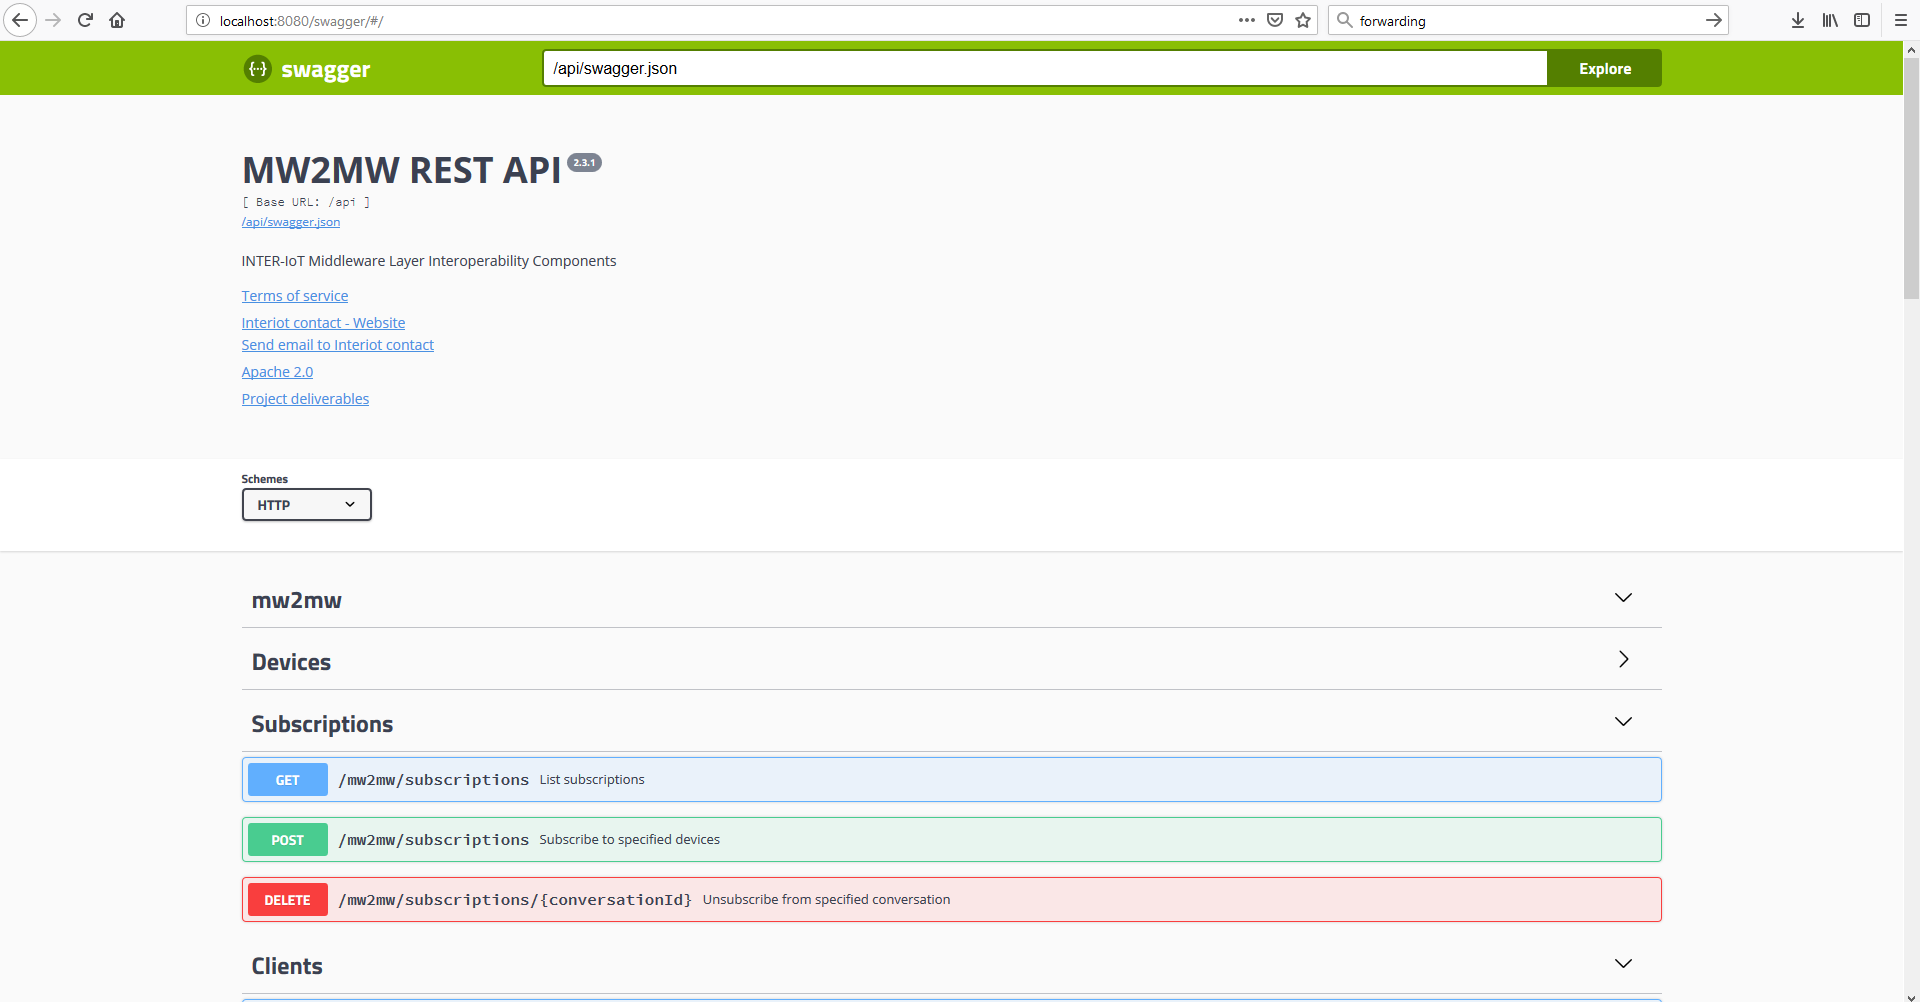
Figure 2. INTERMW API
- http://localhost:15672 for RabbitMQ Message Broker. A web UI as in Figure 3 should be displayed. To enter the application, enter the following username and password: admin, admin.
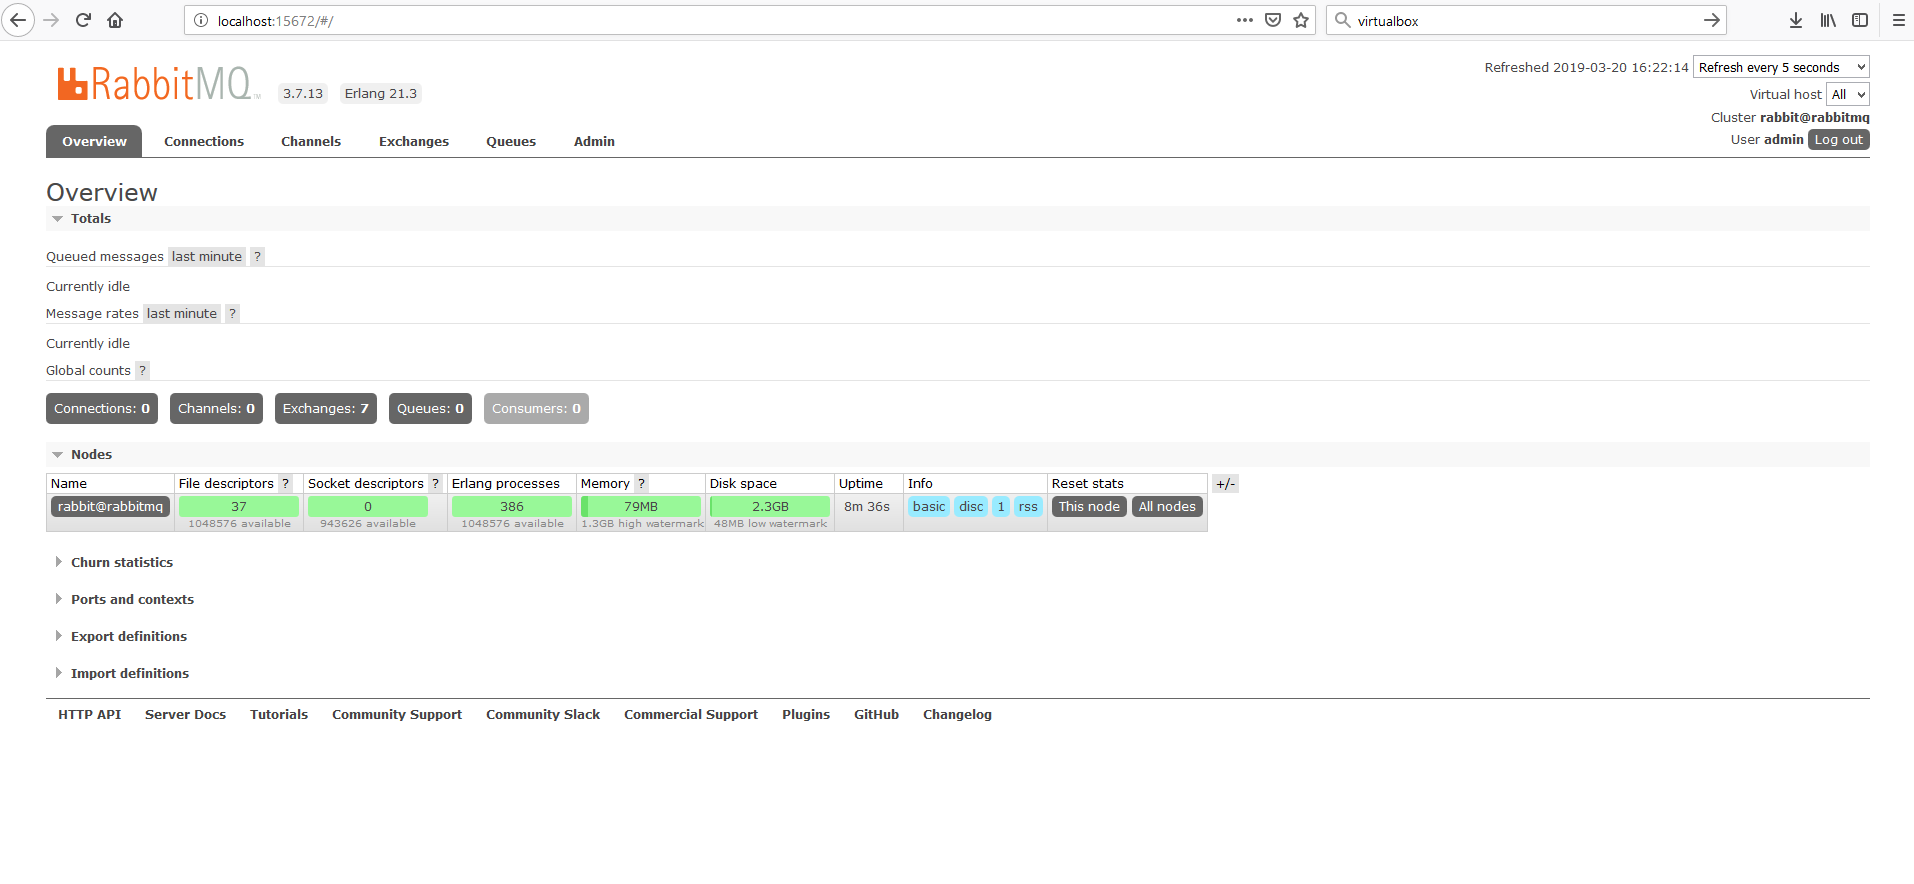
Figure 3. RabbitMQ
- http://localhost:8089 for the Parlamient Triple Store, a Web UI as in Figure 4 should be displayed.
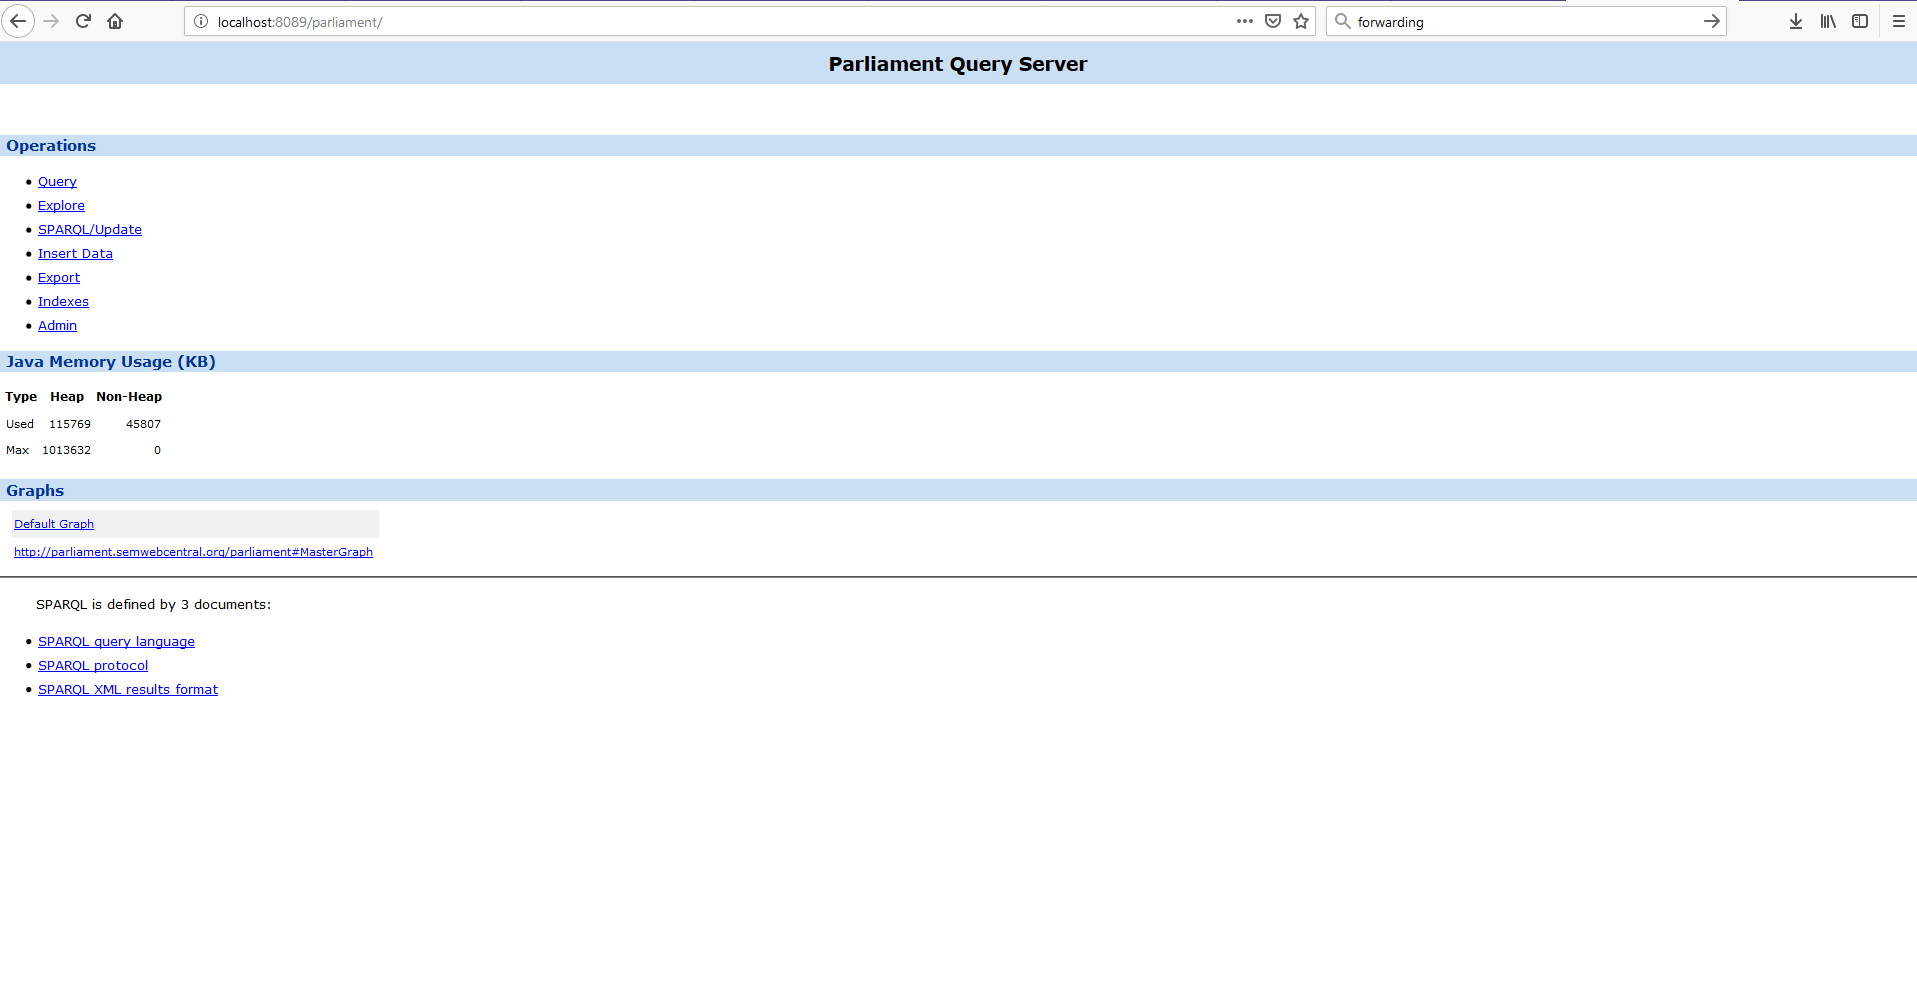
Figure 4. Parlamient Triple Store
In the terminal, execute the following Docker command:
sudo docker ps
to list all the installed Docker containers, as shown in Figure 5.
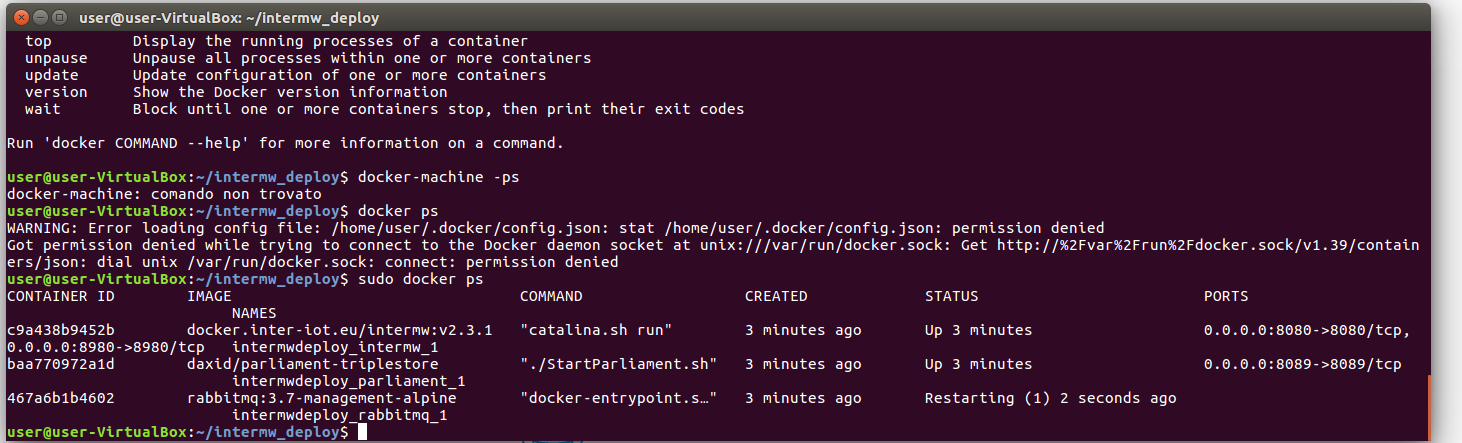
Figure 5. docker ps
BRIDGE DEVELOPMENT
The development of the bridge component consists in the implementation of a Java class which extends the abstract class AbstractBridge and implements its methods (see also the official documentation. Once developed, compile the bridge with the folliwing maven command:
mvn clean package
If the bridge is compiled with success, under the project's root folder, a jar file will be create inside the target folder. We need to copy the jar file in the lib folder of the INTER-MW webapp located in the Docker container of INTER-MW with the following Docker command (see Figure 6 for an example):
sudo docker cp mw.bridge.bc-2.3.0.jar
intermwdeploy_intermw_1:/usr/local/tomcat/webapps/ROOT/WEB-INF/lib
(note that "mw.bridge.bc-2.3.0.jar" is the jar file of the bridge developed for the BodyCloud Proxy platform, so you have to change the filename in the command according to your specific case.)
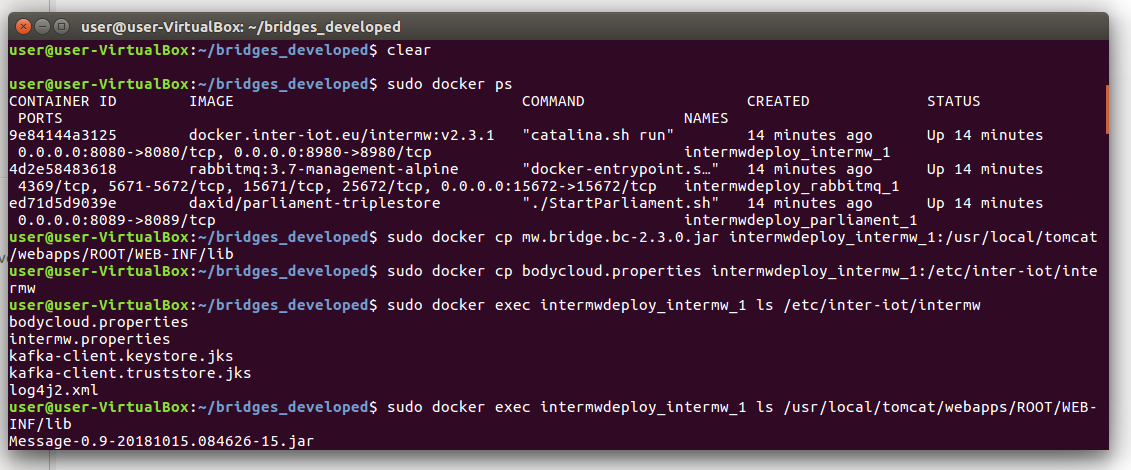
Figure 6. Copy bridge inside docker container
In case a configuration (properties) file is associated to the bridge, it must be copied in /etc/inter-iot/intermw in the INTER-MW Docker container with the following command (see Figure 6 for an example):
sudo docker cp src/main/resources/bodycloud.properties
intermwdeploy_intermw_1:/etc/inter-iot/intermw
(remind to change the filepath/filename according to your specific case).
To verify that the config gile has been copied successfully, execute the following command (see Figure 6 for an example):
sudo docker exec intermwdeploy_intermw_1 ls /etc/inter-iot/intermw
It is now necessary to restart INTER-MW with the following command:
docker-compose restart intermw
Verify that the developed bridge is properly loaded by INTER-MW with the following command:
docker-compose logs intermw | grep -A 5 "Registering bridges"
as shown in Figure 7.
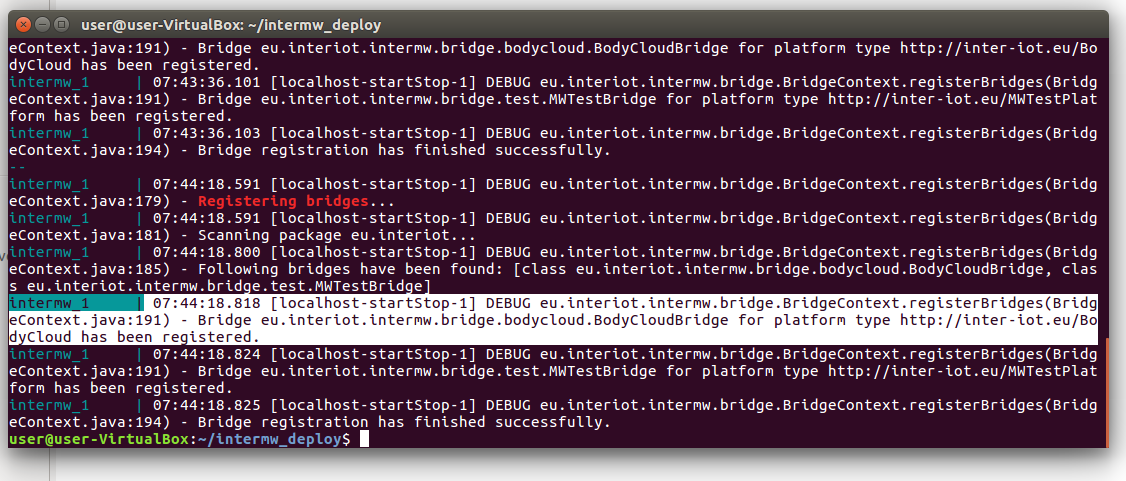
Figure 7. Registering bridges
For further information, visit the official documentation.
The source code of the bridge developed for the BodyCloud Proxy platform cane be downloaded here.
Messages translation may be necessary; if this is the case, you will have to implement a Syntactic Translator.
In the case of the BodyCloud Proxy, it was necessary to carry out syntactic translation, through the implementation of a BodyCloudV2Translator class that implements the SyntacticTranslator \<String> class. BodyCloudV2Translator performs a preliminary translation of the message from the JSON format to the Jena format. This translation occurs in the bridge before the message is forwarded to INTER-MW.
The bridge has the purpose of connecting the platform to INTER-MW. In the specific case of BodyCloud Proxy it aims to guarantee that the subscription messages for a specific device, coming from INTER-MW, will reach BodyCloud, and vice versa.
MODIFY THE PLATFORM
The creation and installation of the bridge alone cannot (always) make one platform communicate with the other. It may be also necessary to make changes to one or both platforms in order to complete the integration supported by INTER-MW.
In the specific case of BodyCloud Proxy, it was necessary to add a software module that manages the subscriptions: BodyCloud Proxy had to receive subscription-type messages from the INTER-MW and at the same time to forward messages related to some subscriptions (always through INTER-MW).
(How it Works) Running and collecting results
To test the implemented bridge we proceeded as follows using the INTER-MW REST API with the curl command.
- Creating a user on INTER-MW
    -   curl -X POST "http://localhost:8080/api/mw2mw/clients" -H
        "accept: application/json" -H "Content-Type:
        application/json" -d "{ \"clientId\": \"pino\",
        \"callbackUrl\": null, \"receivingCapacity\": 10,
        \"responseFormat\": \"JSON\", \"responseDelivery\":
        \"CLIENT_PULL\"}"
- Registering a BodyCloud platform on INTER-MW
    -   curl -X POST "http://localhost:8080/api/mw2mw/platforms" -H
        "accept: application/json" -H "Client-ID: pino" -H
        "Content-Type: application/json" -d "{ \"platformId\":
        \"http://inter-iot.eu/BodyCloudID\", \"type\":
        \"http://inter-iot.eu/BodyCloud\", \"baseEndpoint\":
        \"https://interiot.unical.it:8443\", \"location\":
        \"http://inter-iot.eu/UNICAL\", \"name\": \"BodyCloud
        Platform\", \"username\": \"interio\",
        \"encryptedPassword\":
        \"868d9e67a0978cfa347252ce264a5e3b7f559e3c9c05be8f665d2c7657960d4d\",
        \"encryptionAlgorithm\": \"SHA-256\",
        \"downstreamInputAlignmentName\": null,
        \"downstreamInputAlignmentVersion\": null,
        \"downstreamOutputAlignmentName\": null,
        \"downstreamOutputAlignmentVersion\": null,
        \"upstreamInputAlignmentName\": null,
        \"upstreamInputAlignmentVersion\": null,
        \"upstreamOutputAlignmentName\": null,
        \"upstreamOutputAlignmentVersion\": null,
        \"locationLat\": 0, \"locationLong\": 0,
        \"locationDescription\": \"string\"}"
- Creating a device of USER00 INTER-MW
    -   curl -X POST "http://localhost:8080/api/mw2mw/devices" -H
        "accept: application/json" -H "Client-ID: pino" -H
        "Content-Type: application/json" -d"{ \"deviceTypes\":
        [ \"DEVICE\" ], \"deviceId\":
        \"http://inter-iot.eu/USER00\", \"hostedBy\":
        \"http://inter-iot.eu/BodyCloudID\", \"location\":
        \"http://inter-iot.eu/utente\", \"name\":
        \"http://inter-iot/utente\", \"hosts\": [],
        \"forProperty\": [], \"madeActuation\": null,
        \"implementsProcedure\": null, \"observes\": [],
        \"detects\": null, \"madeObservation\": null }"
- In the file BodyCloudBridge.properties it was changed the bodycloud-url property from bodycloud-url=https://localhost:8443/BodyCloud to
bodycloud-url=https://interiot.unical.it:8443/BodyCloud
- Subscription to the USER00 device
    -   curl -X POST "http://localhost:8080/api/mw2mw/subscriptions"
        -H "accept: application/json" -H "Client-ID: pino" -H
        "Content-Type: application/json" -d "{ \"deviceIds\": [
        \"http://inter-iot.eu/USER00\" ]}"
At this point, by checking the INTERMW log, you can see how the bridge worked correctly as shown Figure 8. You can see how the subscription request was correctly processed.
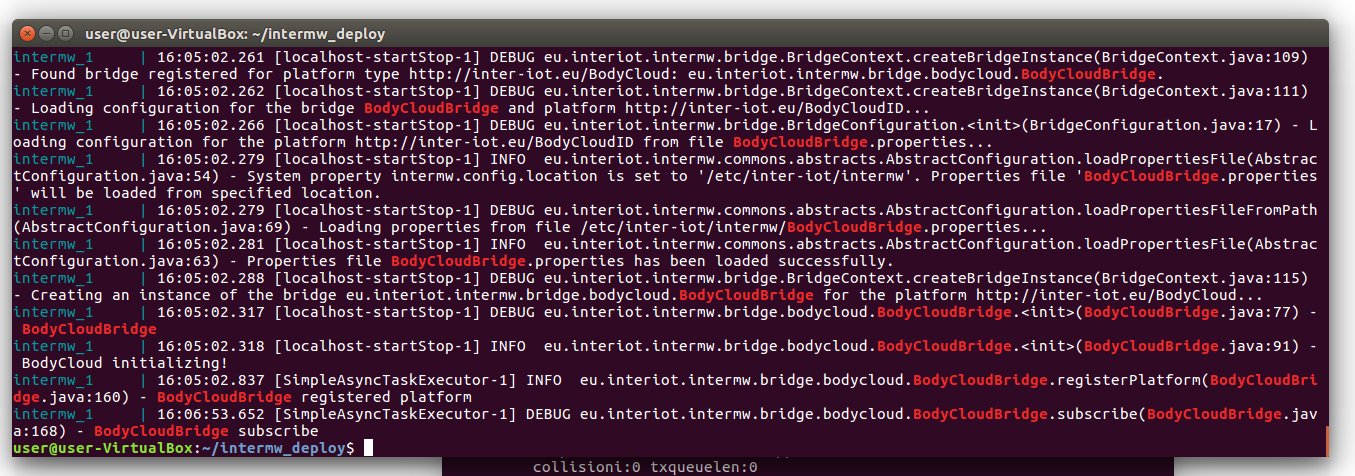
Figure 8. INTER-MW subscribe
In particular you can see in Figure 9 how the callback was successfully executed.

Figure 9. more detail INTERMW log
Furthermore from the BodyCloud Proxy log file you can check how the request for subscription to the USER00 device has been received, as shown in Figure 10.

Figure 10. BodyCloud log