Controlling the accountability
(Getting Ready) Communication scenario description
API Monetization is being able to charge developers for APIs that contain business information needed to build applications. This is done using billing plans. WSO2 API Manager allows you to manage, govern and monetize APIs.
Recipe ingredients
(How to Do it) Software installation and module configuration
To enable/disable subscriptions through the UI,
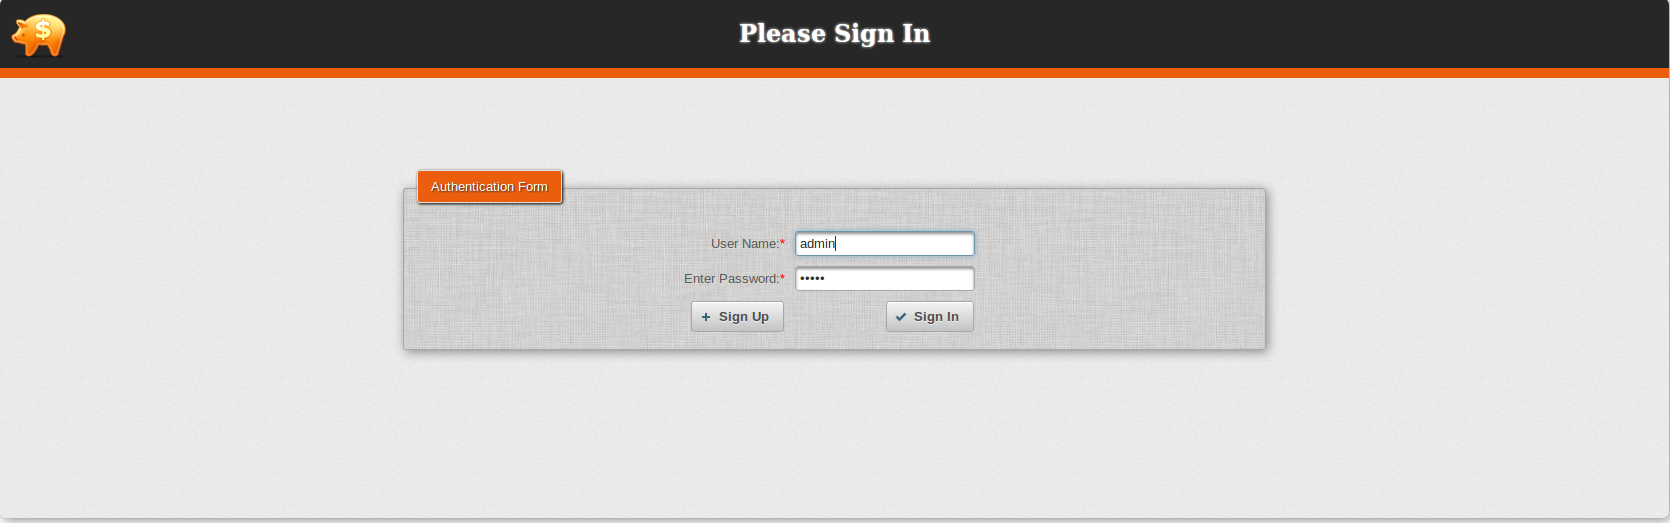
Sign in to the API Publisher. https://:9443/publisher (e.g. : https://localhost:9443/publisher). Or replace the URL for the URL where the API publisher is deployed.
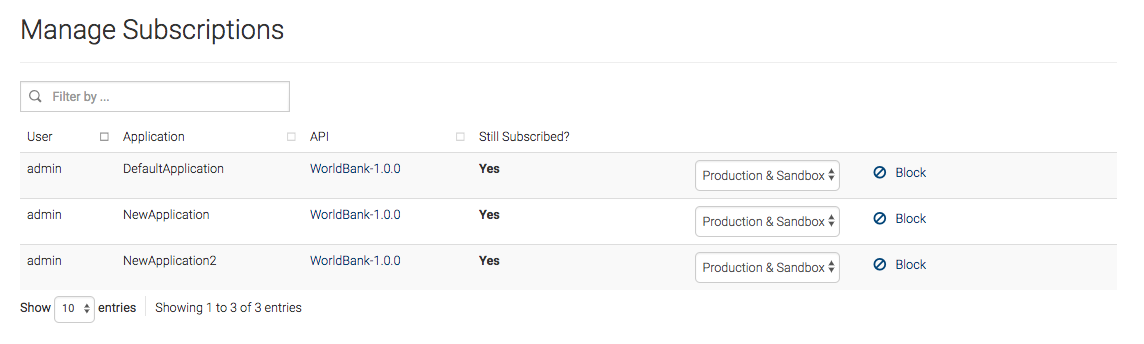
In the HOME menu, click MANAGE SUBSCRIPTIONS.
To disable the subscription of a particular API, click Block. Now, an API Store user is unable to invoke that API until it is re-enabled.
Configuring API Manager Analytics
For the billing engine to be able to retrieve data, you have to configure WSO2 API Manager Analytics. The API invocation related events are published to WSO2 APIM Analytics, which then persists all the events and makes them available in internal tables. To help the billing engine work efficiently, you may also want summarized data sets based on the raw event data.
Implement workflow extensions
To implement the default subscription workflow, start a new maven project and create a new class named SubscriptionBillingWorkflow. You need to implement the methods as per the source code here. If you need to modify the existing workflow (or even write a new workflow, you can create a new project and a new class. This class name must be the name you use in step 4. You could do so within the implemented methods in the above code. Once you have implemented the workflow, proceed to deploying the workflow extention, which is explained in the section below.
Configuring the billing engine
This is a sample billing engine provided for you to test out this feature.
-
Create a MySQL database called
billing. This is the database that will store information regarding the application users, the billing plans, and the invoices. -
Download the sample billing engine provided for WSO2 API Manager. You can also build it from here.
-
To deploy the
.warfile in a Tomcat container, start a Tomcat server and deploy the downloaded.warfile in itswebappsfolder. -
Locate the deploy webapp and edit the
<apim-billing-engine-home>/WEB-INF/classes/datasource.propertiesfile as shown below, in order to enable the webapp to write data into the database and pull data from the Analytics server. -
url=jdbc:mysql://localhost:3306/billing
username=rootpassword=passdriverClassName=com.mysql.jdbc.Driverdialect=org.hibernate.dialect.MySQL5InnoDBDialectapimStoreUrl=https://localhost:9443/apimUserName=adminapimPassword=admindasUrl=https://localhost:9444/dasUserName=admindasPassword=admin-
jksPath=<extracted_apim-billing-engine-home>/WEB-INF/classes/wso2-jks/wso2carbon.jks -
Navigate to the main page of the billing engine at http://localhost:8080/apim-billing-engine-1.3.0/app/main.
-
Sign up as a user.
-
Log in using the newly created user. This is when the tables are created in the billing database that you created in step 1.
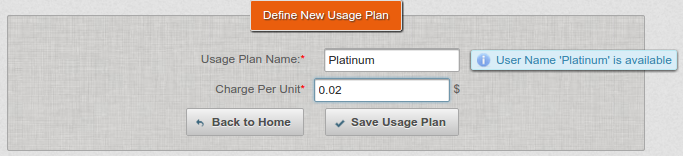
You can define two different types of billing plans based on the WSO2 API Manager billing model,
- Subscription-based Usage Plan: Charges based on the subscription fee and fee per additional request.
- Request-based Usage Plan: Charges a fixed fee per request.
Configuring API Manager
- Define the data source for the billing engine. Since the workflow extension is used, define the billing engine user details data source configuration in the
<API-M home>/repository/conf/datasources/master-datasources.xmlfile, as given in the example below.
<datasource>`` ``<name>BILLING_DB</name>`` ``<description>The datasource used ``for registry and user manager</description>`` ``<jndiConfig>`` ``<name>jdbc/BILLING_DB</name>`` ``</jndiConfig>`` ``<definition type=``"RDBMS"``>`` ``<configuration>`` ``<url>jdbc:mysql:``//localhost:3306/billing?autoReconnect=true</url>`` ``<username>root</username>`` ``<password>pass</password>`` ``<driverClassName>com.mysql.jdbc.Driver</driverClassName>`` ``<maxActive>``50``</maxActive>`` ``<maxWait>``60000``</maxWait>`` ``<testOnBorrow>``true``</testOnBorrow>`` ``<validationQuery>SELECT ``1``</validationQuery>`` ``<validationInterval>``30000``</validationInterval>`` ``<defaultAutoCommit>``false``</defaultAutoCommit>`` ``</configuration>`` ``</definition>``</datasource>
- To configure the billing engine URL, open the
<API-M home>``/repository/conf/api-manager.xmlfile and add the following configuration under<APIManager>.
<billingEngineUrl>http:``//localhost:8080/apim-billing-engine-1.3.0/app/main</billingEngineUrl>
- Since WSO2 API Manager is configured for monetization, enable the API status to free or premium. To enable this flag edit, the registry location, log in to the management console and open the
_system/config/apimgt/applicationdata/tenant-conf.json
file. Make the changes given below:
- To enable monetization, set the
EnableMonetizationproperty totrue. -
To define if the unlimited tier is paid, set the
IsUnlimitedTierPaidproperty totrue. -
Copy and paste the MySQL jar to the
/repository/component/libdirectory, since the extension workflow uses the MySQL connector.
(How it Works) Testing the system
-
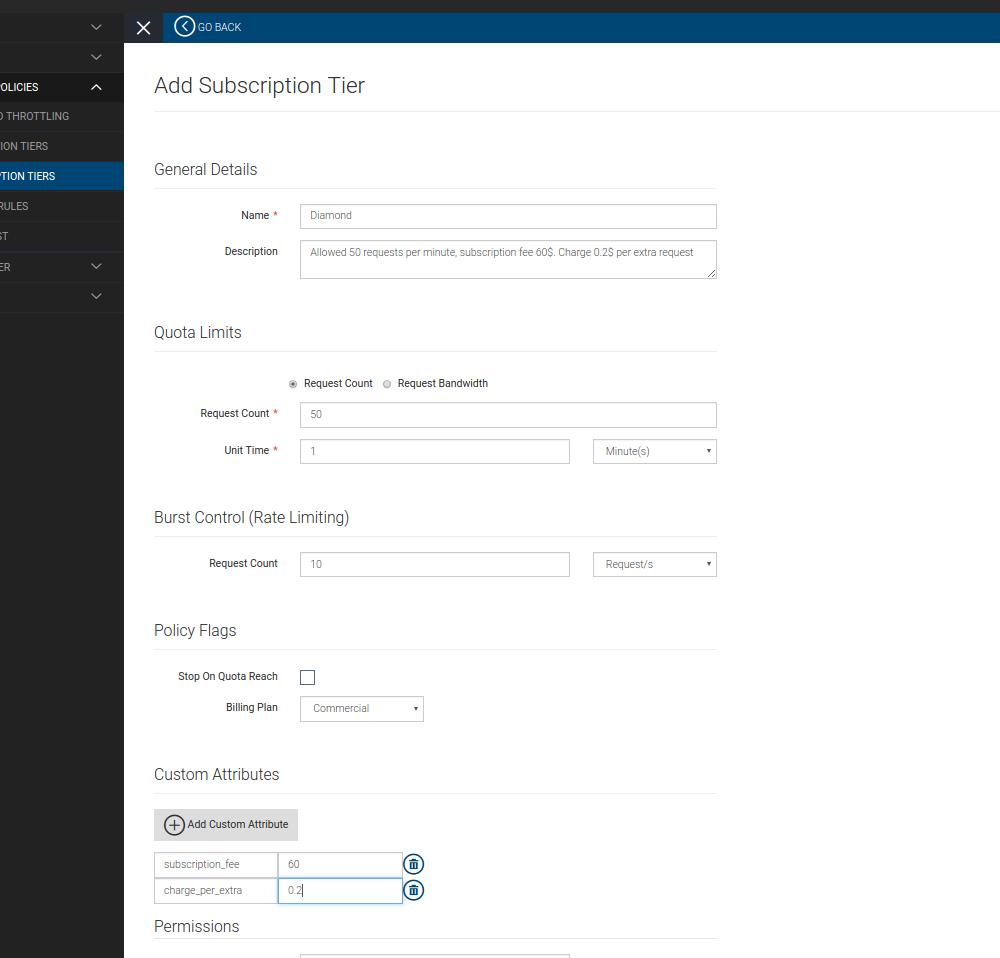
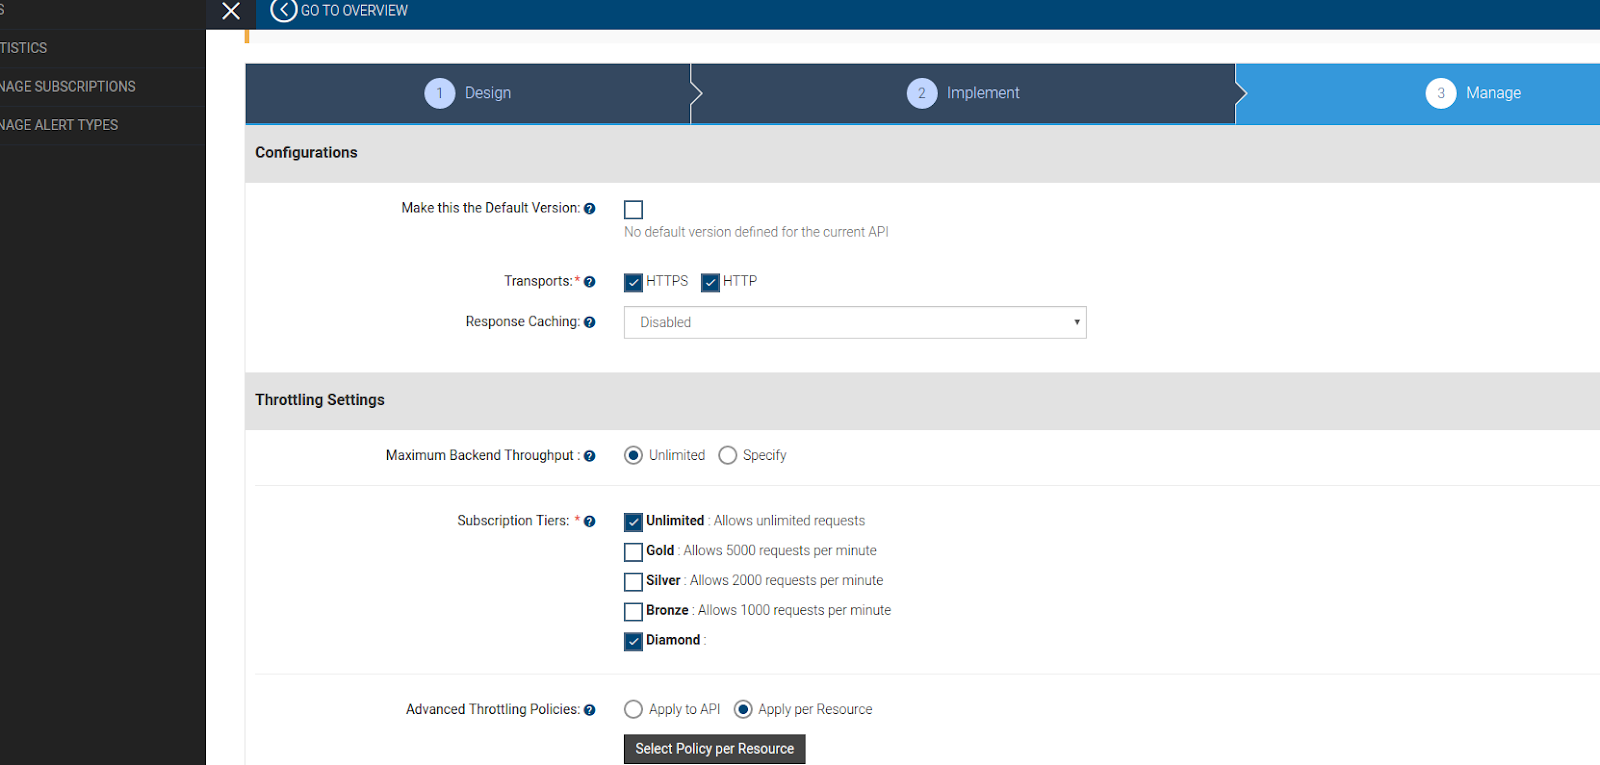
Create a subscription tier in the Admin Portal.
-
Log in to the API Publisher (
https://localhost:9443/publisher), and deploy the API. -
Edit the sample API. Go to the Manage tab and select the new tier you created in the previous step. Click Publish.
-
Log in to the API Store.
-
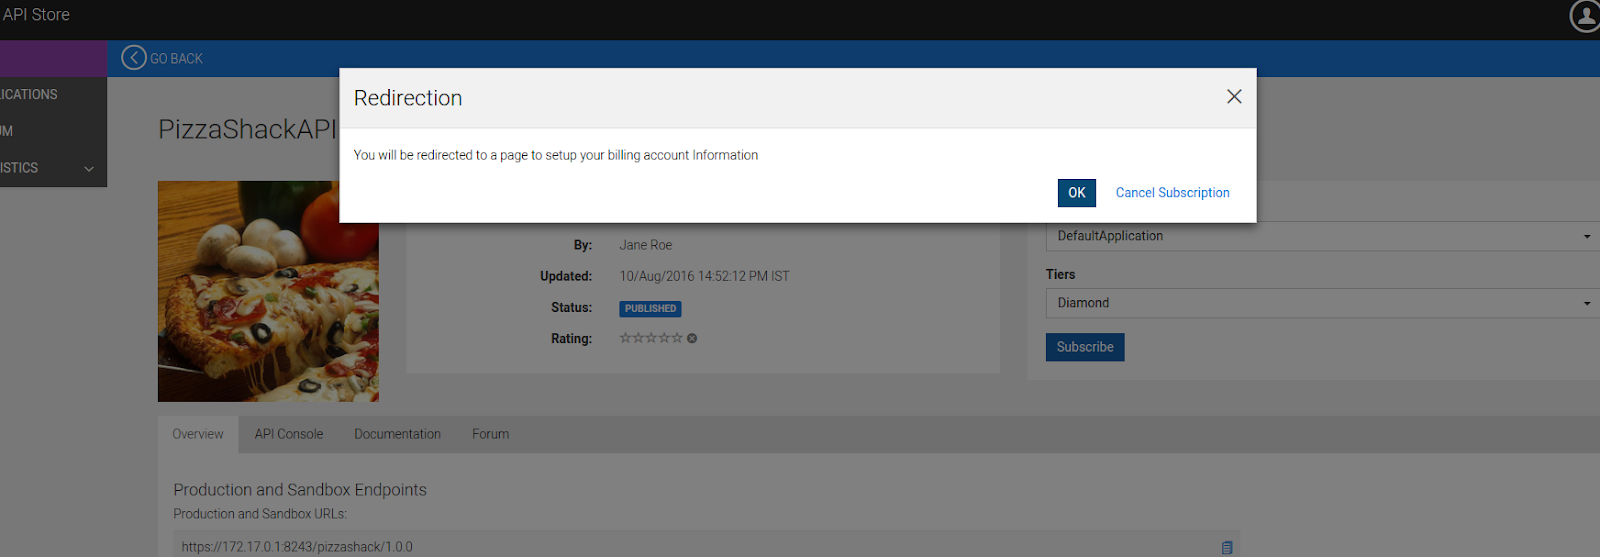
Subscribe to the sample API using the Default Application or create a new application and subscribe. You are re-directed to the billing engine.
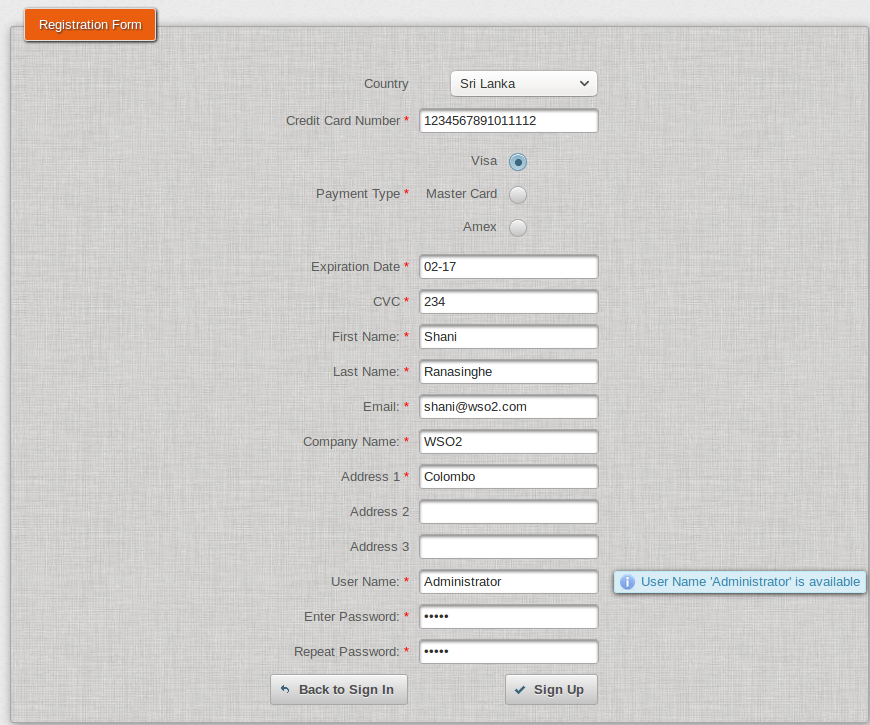
-
Sign up using the billing engine. You are re-directed to the API Store with a successful subscription.
-
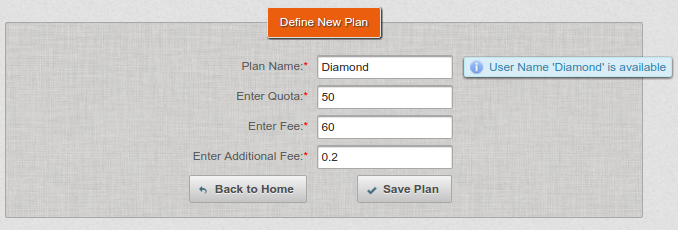
Create a new billing plan according to your subscription tier, as shown below.

-
Invoke the sample API from the API Store.
-
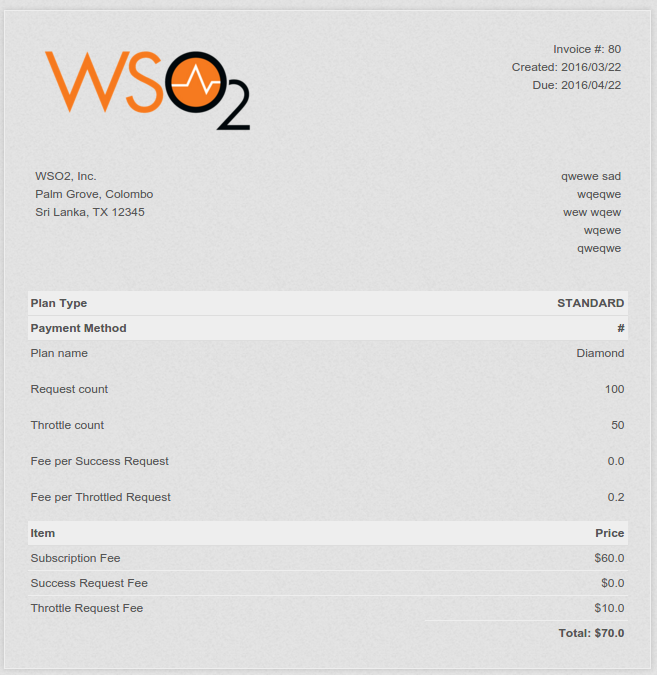
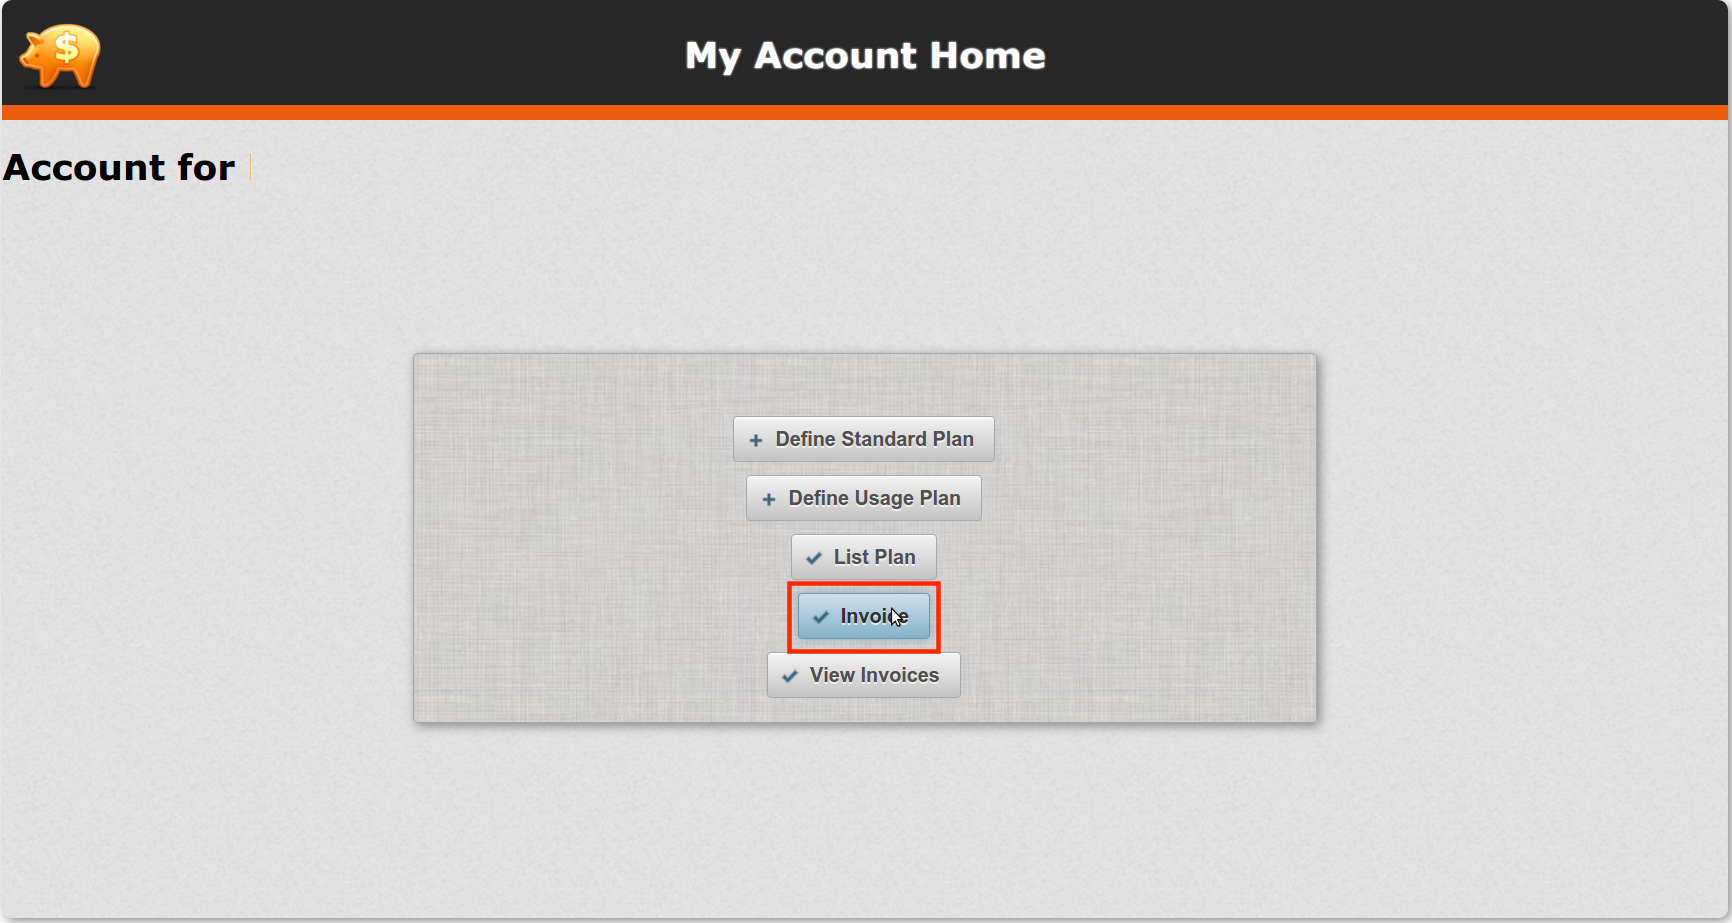
Go to the billing engine and generate an invoice as shown below,
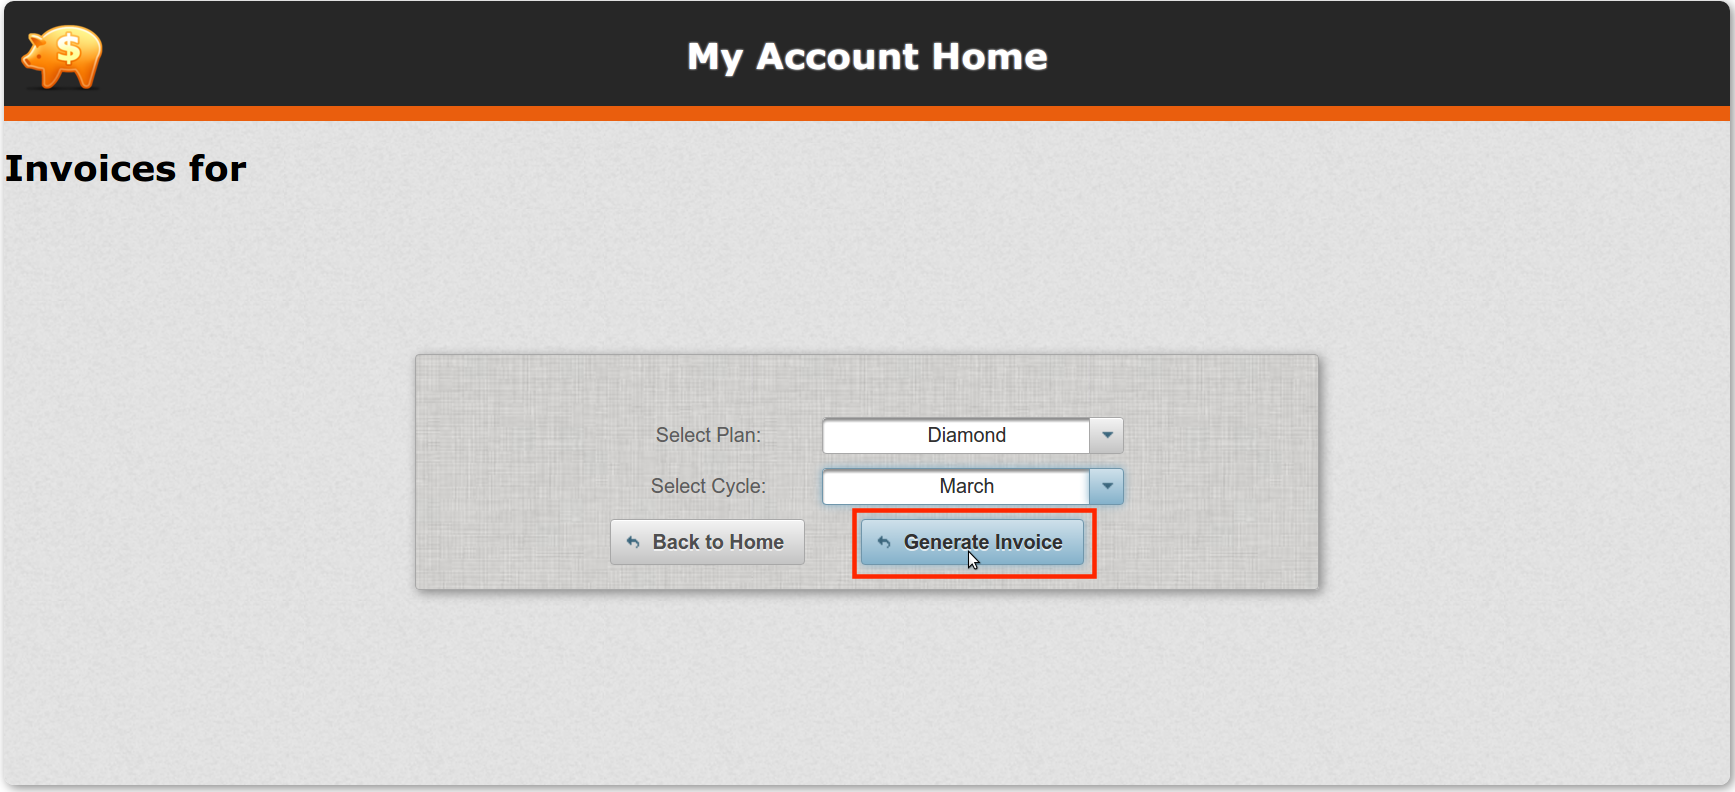
Select the correct plan and month in order to generate the invoice.
- Your invoice is generated based on usage.