INTER-FRAMEWORK: How to deploy
(Getting Ready) Scenario description
This recipe describes how a developer or an integrator can deploy the software of INTER-FW from the source code downloaded from the original repository. The preliminary scenario is, thus, a computer with enough space in disk (2GB) and an Internet connection. Depending on the application and the specific purpose, the requirements could be more demanding (e.g. to deploy in a development environment vs a production environment). This recipe assumes that the user has development purposes.
Recipe ingredients
Hardware: One computer, Internet access infrastructure
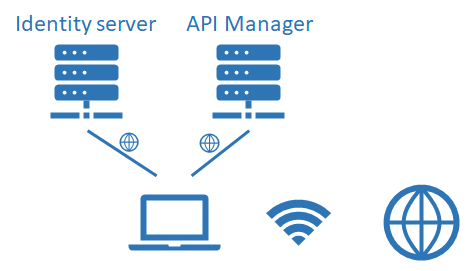
Software: An operative system. In the example we will use Ubuntu 18.04. The source code of INTER-FW must be downloaded in the work directory. Identity server and API Manager already deployed in reachable servers.
(How to Do it) Software deployment
The framework requires some preliminary software packages: MongoDB for the framework backend, MySQL and apache server for the WSO2 infrastructure, NodeJS and npm. They are installed as follows:
root@Inter-IoT:/home/demo# apt-get install mongodb mysql-server apache2 nodejs npm
To start MongoDB:
root@Inter-IoT:/home/demo# service mongodb start
Starting database mongodb [ OK ]
To start MySQL service:
root@Inter-IoT:/home/demo# service mysql start
Starting MySQL database server mysqld No directory, logging in with HOME=/
After this, we can install the pm2 process manager:
root@Inter-IoT:/home/demo# npm i -g pm2
\+ [pm2@3.4.0](mailto:pm2@3.4.0)
added 7 packages from 5 contributors, removed 8 packages and updated 11 packages in 250.221s
And create the default configuration of the apache server:
root@Inter-IoT:/home/demo# nano /etc/apache2/sites-enabled/000-default.conf
root@Inter-IoT:/home/demo#
root@Inter-IoT:/home/demo# service apache2 restart
\* Restarting Apache httpd web server apache2 [ OK ]
Once started Apache, we can start the INTER-FW
root@Inter-IoT:/home/demo# pm2 start --name "API-InterFW" /opt/interfw-server/main.js
(How it Works) Running and collecting results
INTER-FW is configured by default to be deployed in the URL http://localhost (if deployed locally).
(More…) How to deploy in a remote server
Similarly, INTER-FW can be deployed on a remote, only checking that the different references to servers are correctly addressed.
To change the routes and deploy INTER-FW in other direction, there are different files in the system to be changed, some in the framework and some others in the API Manager and the Identity Server configurations. Generally, the way to modify is to look for localhost keyword and change to the desired route/domain.
List of files to modify in framework:
framework/interiot-wfk-server/config.json
framework/interiot-wfk-server/config_local.json
framework/interiot-wfk/src/components_app/apimanagement/api_is.vue
framework/interiot-wfk/src/components_app/apimanagement/api_publisher.vue
framework/interiot-wfk/src/components_app/apimanagement/api_store.vue
framework/interiot-wfk/src/components_app/apimanagement/apimanagement.vue
List of files in the API Manager:
wso2am-2.2.0/repository/conf/api-manager.xml
wso2am-2.2.0/repository/conf/carbon.xml
wso2am-2.2.0/repository/conf/security/authenticators.xml
wso2am-2.2.0/repository/deployment/server/jaggeryapps/admin/site/conf/site.json
wso2am-2.2.0/repository/deployment/server/jaggeryapps/publisher/site/conf/site.json
wso2am-2.2.0/repository/deployment/server/jaggeryapps/store/site/conf/site.json
List of files in the Identity Server:
wso2is-5.4.1/repository/conf/carbon.xml
wso2is-5.4.1/repository/conf/security/authenticators.xml